How to Upgrade RAM On a Laptop - FAQs
Published 19th July 2019 | Article by MemoryCow | Posted in FAQs
Most of us own a laptop and at somepoint we will find that we need to upgrade the RAM for one reason or another. This is a generic guide and the same procedure can be applied to upgrading DDR2, DDR3 and DDR4 memory.
This guide is based around the upgrade of SODIMMs which are the smaller types of RAM typically found in laptops, AIOs (All In One Desktops), Mini PCs etc.
How to upgrade RAM on a Laptop.
Upgrading or adding more memory to a Laptop may seem a daunting task but it's actually very simple. But first, you are going to need some compatible RAM to install into your laptop. Our RAM finder makes this process super easy. If you already have compatible RAM, go ahead and check out the installation steps below.
Here's our step by step guide on how to upgrade your memory.
1. Disconnect all power from your Laptop by powering down your laptop, then once it has powered down remove all power by unplugging the main cable from the Laptop unit.
2. In the very unlikely event that your Laptop could pass on static damage to your new memory modules, it's recommended that you find and touch an unpainted metal surface on your laptop.
3. Next it's time to locate the memory inside your laptop. You may need to consult your manual in respect of this as some systems may differ in the RAM location, however in a laptop most memory is located behind a panel on the bottom/underside of the laptop secured by 4 or so small philips screws. In some extreme cases your memory may be located under the keyboard.
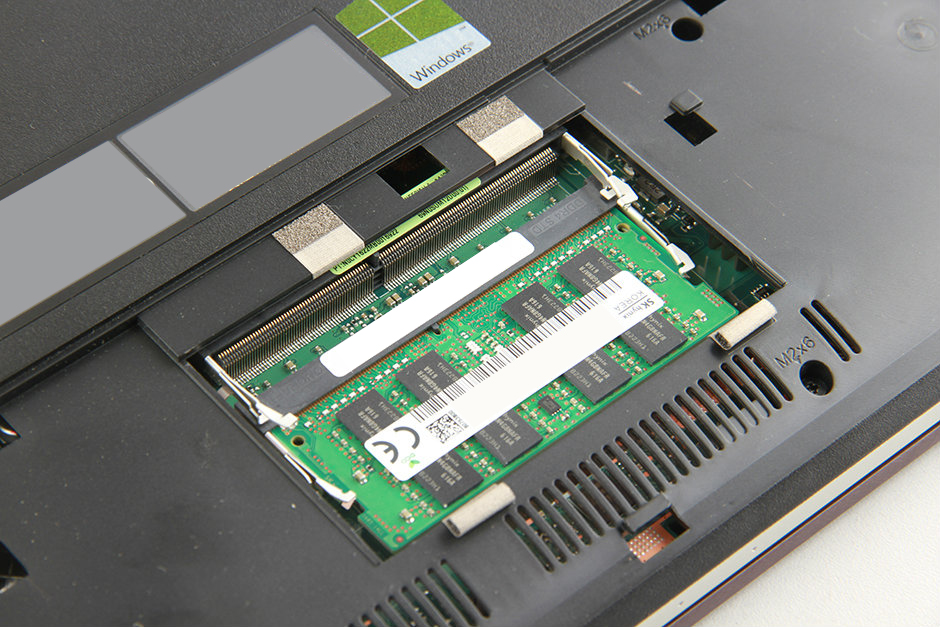
4. Once you have located and removed the cover to gain access to the memory modules you should be presented/see a similar arrangement to the below image.

5. Now it's time to remove the memory so that you can add in more or upgrade your memory by way of removing any existing memory and replacing it with higher capacity modules.
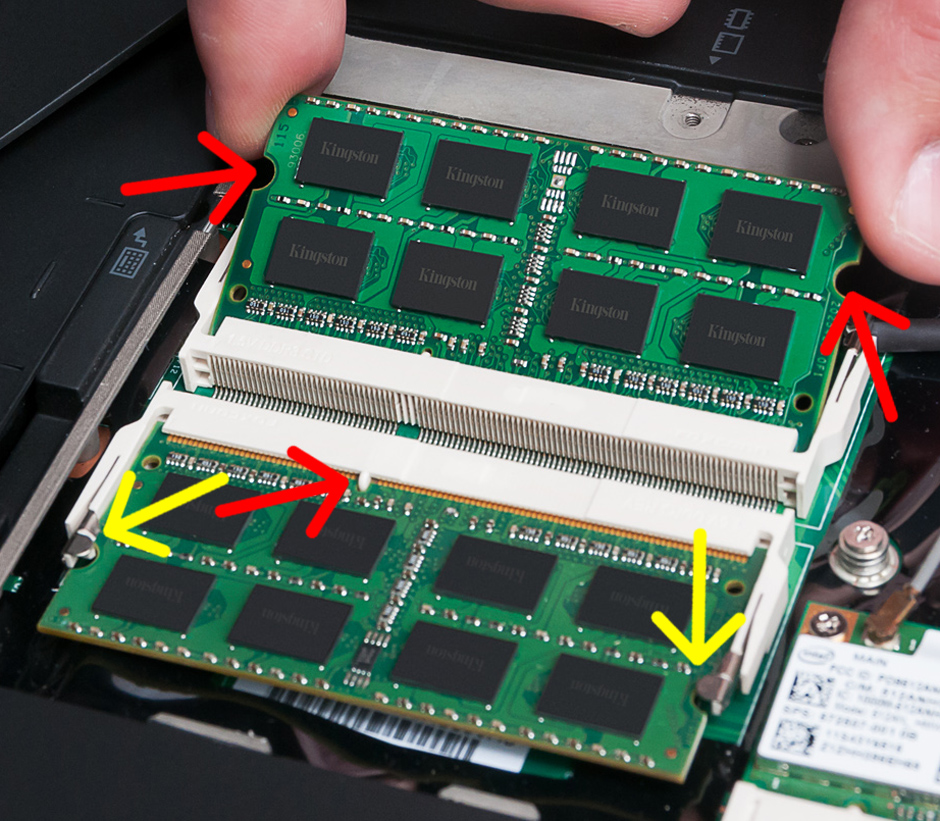
- The red arrows below indicate the main anchor points of the memory which allows for secure attachment to your system. Note the bottom red arrow which is also known as the "notch" or "key" which is unique to each memory type in respect of DDR2/DDR3/DDR4. These are unique to each memory type mentioned which means you cannot accidentally install the incorrect memory into your system as it would not physically fit.
- The yellow arrows below indicate the clips that hold the memory in place.
- To remove the memory from place you simply gently press the silver tabs on the sides of the memory (yellow arrows) which will then allow you to pull/slide the memory out from the notched key.

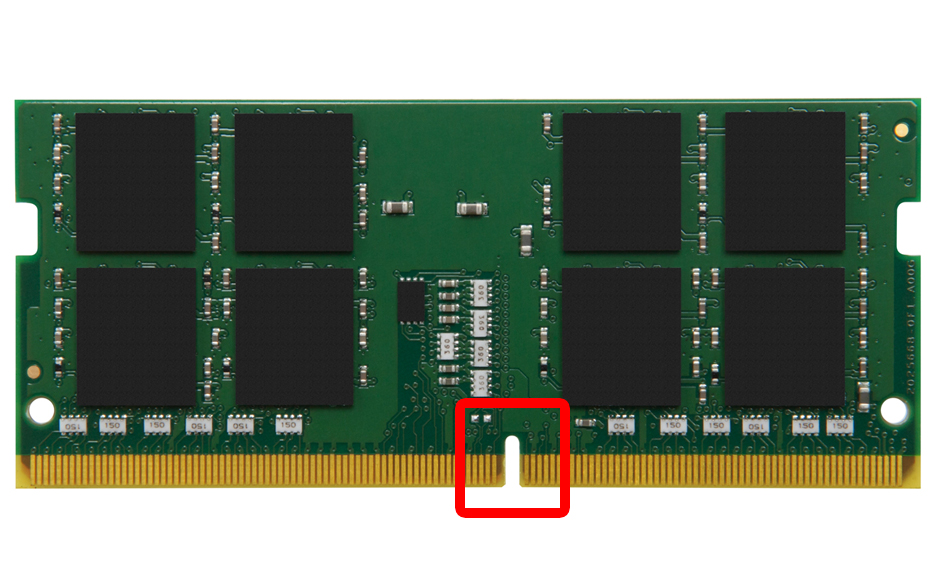
6. The fitment of your new memory modules is simply the reverse of point 5, except your starting point would be to line up the "notch/key" on the memory housing tabs, with the indentation on your memory, as indicated below before securing down with the side clips (yellow arrows above). See "notch/key" below.

7. Once you are happy that you have fitted the memory correctly, re-screw the cover back down on the base of your laptop (the opposite of the removal), re-connect any power cables and then power on/boot your laptop and the system will instantly recognise your new installed memory. Sometimes your system via the BIOS may recognise that new memory has been installed but in most cases you will be prompted which options to select via the BIOS.

